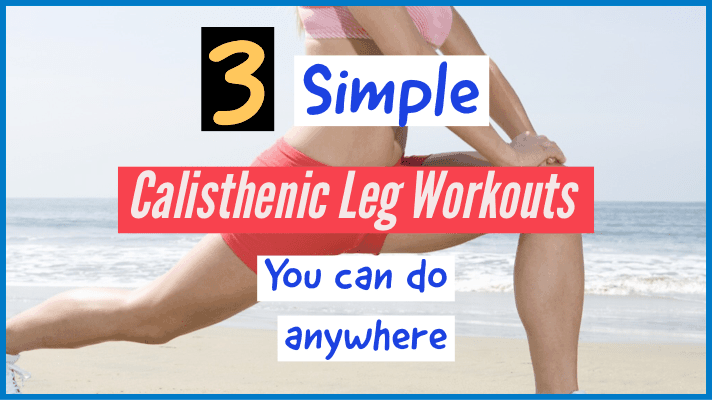
Are you looking for a simple, fast, and effective calisthenics leg workout?
You’re in the right place.
This post will give you three different bodyweight leg workouts you can do anytime, anywhere.
I know that you’re busy so there will be no fluff.
Let’s get started.
The Best Calisthenic Leg Exercises
First, let’s start by going over the exercises that will make up your workouts.
These are the best calisthenics leg exercises.
There are two main categories.
- Knee dominant exercises
- Hip dominant exercises
Let’s go over each one.
The Knee Dominant Bodyweight Leg Exercises
The first kind of calisthenic leg exercise is the knee dominant pattern.
These exercises will strengthen and develop your quadriceps and adductor muscles.
The best of the best is the squat.
The Squat
The squat is the most fundamental bodyweight leg exercise. It strengthens many of the biggest muscle groups in your legs. It also helps improve the mobility of your hips and ankles.
There are many different variations you can perform depending on your skill level.
Level 1: Bodyweight Squats
The first level is the basic bodyweight squat. Here’s how to do it.
- Set your stance shoulder-width apart
- Point your toes straight or out 15-30 degrees
- Keep your back flat
- Bend at the hips and knees simultaneously
- Make sure that you keep your heels flat on the floor
- Squeeze your glutes to come back up
This exercise is great for beginners who need to learn proper squatting mechanics.
Level 2: Archer Squats
Once you master the bodyweight squat, it’s time to move on to level 2.
The archer squat is more challenging than the traditional squat for two reasons:
- One leg will do more work than the other, increasing your single leg strength.
- It requires more balance, mobility and coordination
Here’s how to do it:
- Widen your stance as far as you con comfortably go
- Point your toes out to around 45 degrees
- Squat down towards one side while keeping the other leg straight on the floor
- Keep your working heel flat on the ground and your back flat
If you cant go all the way down, just work with your current range of motion.
Level 3: Pistols
The final level of the squat variation is the Pistol squat. This is the most challenging calisthenic leg exercise.
It requires a great deal of strength and balance. Work your way up to this exercise slowly.
Here’s how to do it:
You probably won’t be able to go straight from an archer squat to pistol squat.
This post covers a few progressions you can do to help you along the way.
The Lunge
The next squat variation that the workout includes is the lunge pattern.
The lunge is a unique single leg exercise that provides you with a different training stimulus.
It improves your split strength and incorporates your glute muscles much more than a traditional squat.
That’s because the lunge activates the external rotators of your legs- which includes the glute medius and glute minimus.
Also, because it’s a single leg exercise, you will improve your balance, mobility, and coordination.
Here’s how to do them.
Level 1: Split Squat Lunge
The split squat is the simplest lunge variation you can do.
It will teach you the basic movement pattern and improve your single leg strength.
This is what it looks like.
- Straddle your stance to a comfortably wide position
- Keep your hips neutral and your core tight
- Squat straight down by bending both knees simultaneously
- Stand back up by flexing the quadricep of the front leg
Level 2: Reverse Lunge
After you master the basic split squat, you can move onto the standard lunge variations.
The easiest of which is the reverse lunge.
It is easier to perform than forward walking lunges and places less stress on your knees.
Here’s how it looks.
- Start with your feet together
- Step back with one foot and plant the balls of your feet on the ground behind you
- Begin squatting down until your back knee is just above the ground
- Push back up with your front leg and slowly bring your feet back together
If the reverse lunge variation is too easy, you can incorporate forward walking lunges to your routine.
Level 3: Bulgarian Split Squats
For level 3, you will do the Bulgarian Split Squat.
As simple as this exercise looks, it is hard. No matter what level of strength you are at, this exercise is tough.
Here’s how it looks.
- Find a chair or a box in which you can rest the front side of your foot on
- Take a few steps forward while keeping your foot rested on the box
- You may have to experiment with your stance width to find a comfortable position
- Begin squatting down until you feel a stretch along the front side of your back leg
- Return to the starting position by flexing the quad of the front leg
Level 3B: The Step-Up
The step up is another exercise that you can do instead of the Bulgarian split squat.
In order to do it correctly, you need to find a chair or a box that you can step up on without the use of momentum. In other words, it shouldn’t be too high.
In contrast, the box shouldn’t be too low either, as it’ll be too easy.
Heres’ what it should look like.
- Place one foot on the box while keeping your back leg straight
- Next, begin leaning forward as much as possible to shift all of your weight to your front leg
- Your back leg should naturally begin to lift off the ground
- Once it does, continue pushing through your front foot until it is fully extended
- Slowly come back down to the starting position
The Hip Dominant Bodyweight Leg Exercises
Next up is the hip dominant movement pattern.
The hip dominant exercises will strengthen the muscles of your posterior chain. These are your hamstring muscles, and your glute muscles.
We are a little limited with the exercises we can choose from to train these muscles. With that said, here are the simplest and best exercises.
The Glute Bridge
Level 1: Glute Bridge
The glute bridge is one of the staple exercises in training your butt and hamstring muscles. It is also a great exercise in helping reverse the bad posture caused by anterior pelvic tilt.
Here’s what it looks like.
- Lay on your back with your knees bent and feet shoulder-width apart
- Begin the movement by squeezing your glutes as hard as you can
- Do not arch at the low back
- Hold the top position for a 3 count before coming back down
Level 2: The Single Leg Glute Bridge
To make this exercise more challenging, you can do single leg glute bridges. This exercise is significantly hard than the two-leg glute bridge, and can illustrate any side to side imbalances you may have.
Heres’ what it looks like:
- This exercise is similar to the standard glute bridge
- Lay on your back with one knee bent, and your other knee extended out
- Try to keep a straight line from your hip down to the toe of the straight leg
- Begin the movement by squeezing the glute of the bent leg as hard as you can
- Once you reach the top, hold this position for a 2 count before coming back down
Level 3: The Single Leg Feet Elevated Glute Bridge
The last way to increase the difficulty of this exercise is to raise your feet up on a platform.
This will increase the distance you have to work.
Here’s what it looks like:
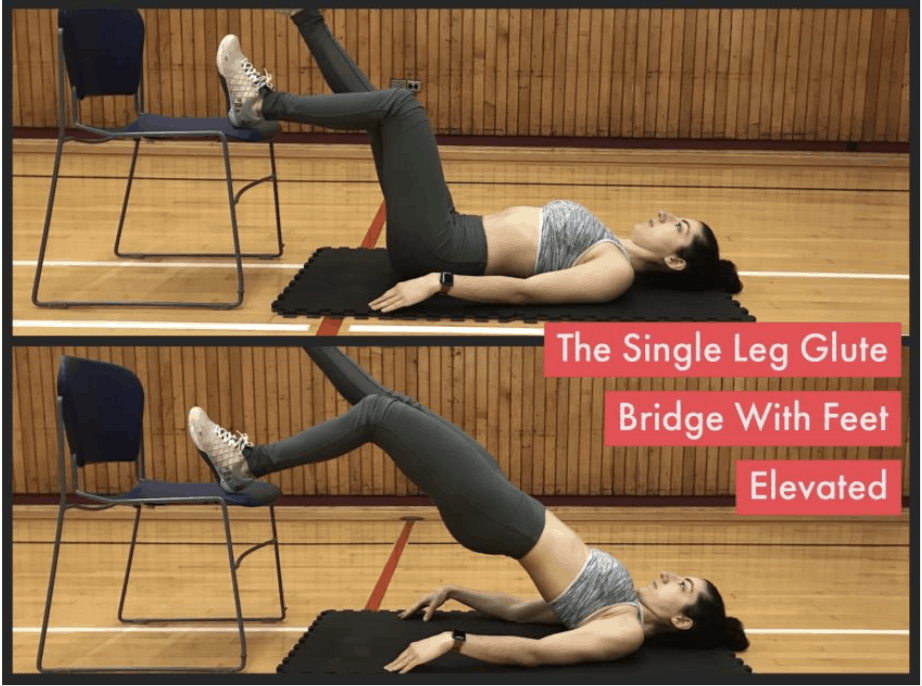
- The exercise is performed the exact same way as the level 2 exercise
- Just find a platform where you can elevate your feet on
- The taller the platform, the more difficult the exercise
The Romanian Deadlifts
The Romanian deadlift is one of the best posterior chain exercises you can do. It is important that you do it correctly, or else you won’t be training the appropriate muscles.
Here is the basic exercise.
Level 1: The Hip-HInge
The hip-hinge basically teaches you how to bend at the hips, rather than at your torso. When doing this exercise, you should feel a really nice stretch along your hamstrings at the bottom of the movement.
Here’s what it looks like.
- Begin with your feet at shoulder-width apart and toes pointing forward
- Start the exercise by pushing your butt backward as much as you can
- You reach the end range once you feel a strong stretch along your entire hamstring
- Make sure that your back stays straight throughout the movement
- Keep a slight bend at your knee
- Reverse the movement by squeezing your glutes at the top
Level 2: Single Leg Romanian Deadlifts
The next progression is the single leg romanian deadlift. Doing this exercise on 1 leg increases the difficulty significantly.
The basic movement is still the same as the hip-hinge.
Here’s what it looks like.
- Begin with your feet at shoulder-width apart and toes pointing forward
- Shift your weight on to one foot, and then push your butt backward as much as you can
- Move slowly to make sure you keep your balance
- You reach the end range once you feel a strong stretch along your entire hamstring
- Make sure that your back stays straight throughout the movement
- You can keep a slight bend at your knee
- Reverse the movement by squeezing your glute at the top
Level 3: Weighted Single Leg Romanian Deadlift
The only way to increase the difficulty of this exercise is to add external resistance. You can do this with dumbbells, a weighted vest, or a backpack.
You could also get yourself a pair of resistance bands.
Here’s an awesome set from Amazon.
Plyometric Bodyweight Leg Exercises
The last category of exercises you should know is plyometric exercises. These exercises build explosive power in your legs.
The two exercises involve jumps.
Here they are:
Box Jumps
The box jump strengthens your hip extension strength while building explosive power. It will also improve your vertical jump.
Heres what it looks like:
- Just make sure to find a box that is appropriate to your jumping ability
- Always land softly
- Keep your toes pointing forward when you land
- Ensure that your knees are always facing forward, and do not collapse inward when you land
Broad Jumps
The last exercise is the broad jump. This exercise is similar to the box squat, except you will be jumping forward.
Here’s what it looks like:
- There isn’t much explanation here
- Do your best to land with a stable foot, hip, and knee position (don’t let your knees cave inward)
_
Alright, now that we have all of the exercises out of the way, let’s get to the workouts.
The Warmup
Before doing any type of exercise, you should always warm-up.
Warming up will increase your body temperature, improve circulation, and prepare your joints for physical activity. Exercising without a proper warm-up can also increase your risk of muscle strains, or joint injury.
Here is a quick warm-up you could do before you begin. (It includes warm-up exercises for the upper body, but you get the point.)
Okay, here are the 3 workouts.
3 Simple Yet Effective Calisthenic Leg Workouts
Below you’ll find three different bodyweight leg workouts.
- The first one is to build muscle
- The second is for strength
- The third one is for power development
Calisthenics Leg Workout For Muscle
Ok, now let’s go over the actual workouts. The first workout will focus on muscular development.
The best way to build muscle is to perform exercises in the 10-15 repetition range. This is different from the traditional sets and reps I recommend for weighted exercises.
That’s because your legs are super powerful, and they can handle a lot of work. Especially bodyweight work.
So it is beneficial to do slightly higher volume when doing calisthenic leg work.
Here is the workout
| Exercise | Sets | Reps |
|---|---|---|
| Squat | 5 | 10-15 |
| Glute Bridge | 5 | 12-15 |
| Reverse Lunge | 5 | 10 per leg |
Squat: 5 sets of 10–15 repetitions
Glute Bridge: 5 sets of 12-15 repetitions, superset with
Reverse Lunges: 5 sets 10 repetitions per leg
Take no more than 30 minutes to do this workout.
You can do it two times per week for best results.
Calisthenics Leg Workout For For Strength
Here is the workout.
The second workout is a strength-based workout. This requires sets in the 8-10 rep range. As such, you need to perform exercises variations that are challenging for you.
| Exercise | Sets | Reps |
|---|---|---|
| Archer Squat | 5 | 8-10 per leg |
| Single Leg Glute Bridge | 5 | 8 per leg |
| Bulgarian Split Squat | 5 | 8 per leg |
Archer Squat: 5 sets of 8-10 repetitions per leg
Single Leg Glute Bridge: 5 sets of 8 repetitions per leg, superset with
Bulgarian Split Squats: 5 sets of 8 repetitions per leg
Take no more than 30 minutes to do this workout.
You can do it two times per week for best results.
Calisthenics Leg Workout For For Power
The third calisthenic workout will be a power-based workout. Power workouts build explosive strength.
It often incorporates plyometric exercises that require a lot of energy to do. As such, you don’t need to perform as many repetitions per set.
Here is the workout.
| Exercise | Sets | Reps |
|---|---|---|
| Pistol Squat | 5 | 5 per leg |
| Box Jumps | 5 | 5 |
| Broad Jumps | 5 | 3 |
Pistol Squat: 5 sets of 5 repetitions per leg
Box Jumps: 5 sets of 5 repetitions
Broad Jumps: 5 sets of 3 repetitions
Take no more than 30 minutes to do this workout.
You can do it two times per week for best results.
How Often Should You Train Legs?
Most of the big muscles groups in your body respond best to twice weekly workouts. Thats why I recommend that you do either of these three workouts two times per week, with 48-72 hour breaks in between.
For example, you can do workout A on Monday and then again on Wednesday or Thursday.
How Many Reps and Sets For Calisthenic Exercises?
Calisthenic exercises respond very similarly to traditional weight training exercises.
That means that lower reps will increase your strength, while higher reps will increase your muscle mass. In general
7-12 repetitions per set are good for hypertrophy
3-6 repetitions per set are good for strength
But there is an exception. Calisthenic leg exercises can sometimes benefit from higher repetitions than the ones shown here.
Why You Should Train Your Legs
If you have any hesitations over training your legs, you shouldn’t.
Lower body training has so many benefits that upper body training could never match. Here are a few:
More muscle mass
Your legs contain the biggest and most powerful muscles in your entire body. If you don’t train them, you are leaving a lot of potential muscle mass on the table.
More muscle mass equals more metabolically active tissue. More metabolic tissue = higher metabolism. Higher metabolism = more calories burned at rest.
There are several studies (1) (2) confirming this
More balance and coordination
Calisthenic leg training also improves your balance and coordination. Once you master the beginner variations, it becomes necessary for you to do single leg progressions. These exercises train your core, and improve your total body proprioception.
This cannot be done with upper body exercises.
Increased mobility
Lastly, leg training is one of the best ways to improve your mobility in the hips, knees, and ankles. On the contrary, upper body exercises tend to do the opposite. They make you more tight and stiff in the shoulders and chest.
Can You Build Legs With Calisthenics?
Yes, you can build leg muscle with calisthenics. Building muscle requires a stimulus in the form of resistance. Your muscles cannot tell if that resistance comes from dumbbells and barbells, or just your bodyweight.
Both forms of resistance will produce tension, and should be sufficient to induce muscle growth.
Is Calisthenics Better Than Weight Lifting?
In regards to legs, no. It is well known that you cannot achieve the same muscular stimulus on your lower body using just calisthenics as you can with weights.
With that said, you can build a similar amount of muscle using calisthenics or weights for your upper body. As to which is better? That’s for you to decide. Check out this post on calisthenics vs weights to help you make your decision.
How To Make Your Calisthenic Leg Workouts More Difficult
We can’t neglect the fact that you are limited when it comes to calisthenic leg exercises. If you only weigh 150 lbs, that is all the weight you have to work with.
Since your legs are composed of so many powerful muscles, you may find that calisthenic leg exercises will get too easy at some point.
The only way around this is to add weights to these exercises. The bodyweight squat can be done with dumbbells, or barbells.
The same could be said for the other knee dominant and hip dominant exercises.
Or you could wear a weight vest.
This one has great reviews on Amazon.
Either way, find a way to add external resistance to these exercises once they become too easy.
A Free PDF That Outlines Calisthenic Upper Body Exercises Too
Enter your email below and I’ll send you a “fill in the blank” workout template for both upper and lower body calisthenics workouts.
Final Words
So here are three effective calisthenic leg workouts you can do anytime, anywhere.
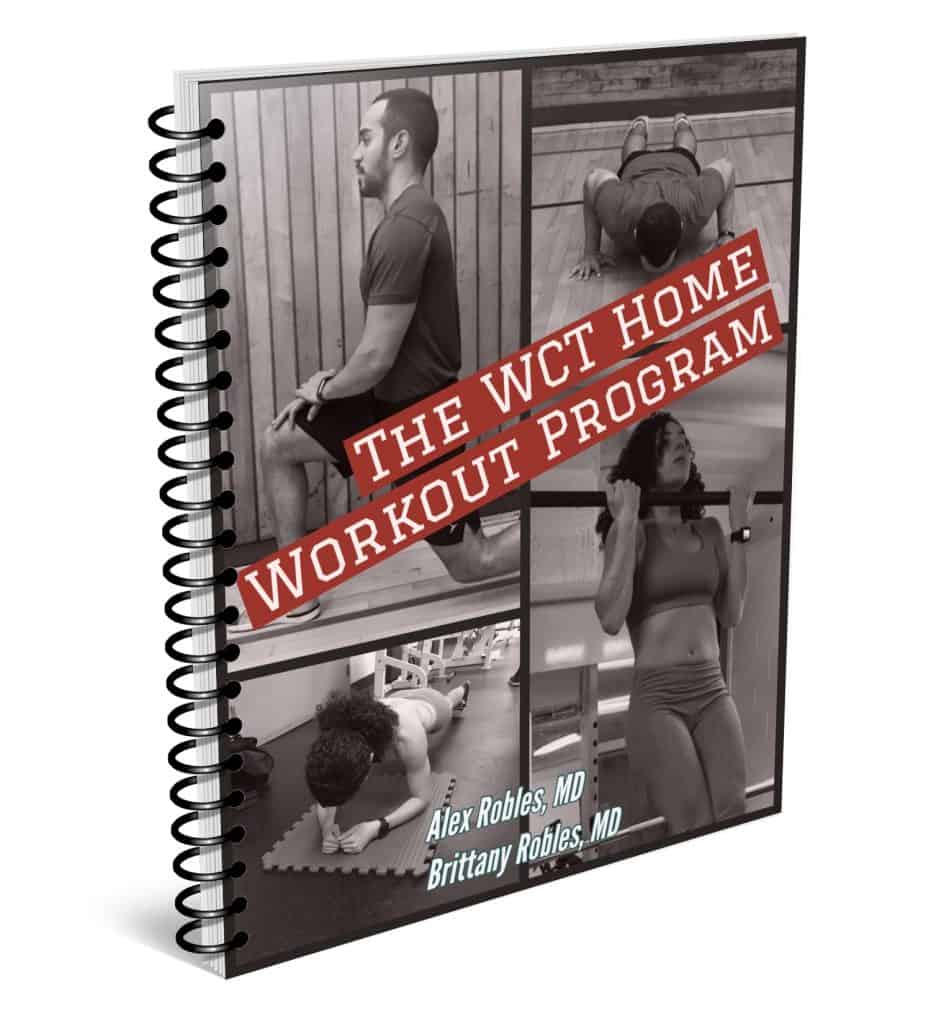
These workouts are also part of a more comprehensive workout program which you can find here.
The WCT Home Workout Program uses bodyweight exercises to provide you with a simple, step-by-step structure to your training.
The workouts are split into upper and lower body days to give you sufficient stimulus for every muscle group.
So what is your goal?
Which would you prefer? Muscle, strength, or power?
Comment below and let us know.
Related Articles:
- The Complete List of Calisthenics Exercises
- Calisthenics For Beginners: Full Guide
- 21 Amazing Bodyweight Shoulder Exercises:
- The Best Calisthenics Workout For Abs [Just 15 Min/Day]

Alex Robles, MD, CPT / Brittany Robles, MD, MPH, CPT
Alex & Brittany Robles are physicians, NASM Certified Personal Trainers, and founders of The White Coat Trainer: a resource dedicated to improving the health and fitness of busy professionals using time-efficient strategies. Their advice has been featured in My Fitness Pal, Prevention, Livestrong, Reader’s Digest, Bustle, The Active Times, and more. Learn more about them here.